Driver Electronic Signature
Last updated: November 18, 2026
EARLY ACCESS — Electronic signature is a paid feature being rolled out to select customers. Interested? Email [email protected].
Electronic signature lets your team send a BOL to a driver's phone for signature instead of printing paper copies. You upload the BOL to the appointment, mark where the driver should sign and date, and Conduit texts the driver one link. The driver signs on their phone, and your team finalizes the signed copies on the appointment.
Conduit does not create the BOL. It takes the BOL your WMS or ERP already produces and handles the signing, sealing, and storage.
Instructions
Before You Start
A driver with a phone number must be on the appointment. That number is where Conduit sends the signing link and the signed copies. It can come from QR code check-in, tablet check-in, manual check-in, or a driver profile your team adds to the appointment.
Each BOL must be:
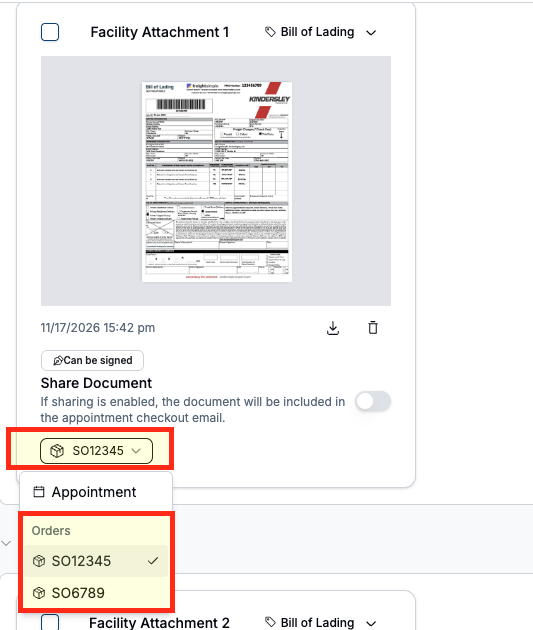
Uploaded under Attachments with the Bill of Lading category.
A PDF. Other file types can't be signed.
A BOL that is ready shows a Can be signed icon on the attachment.
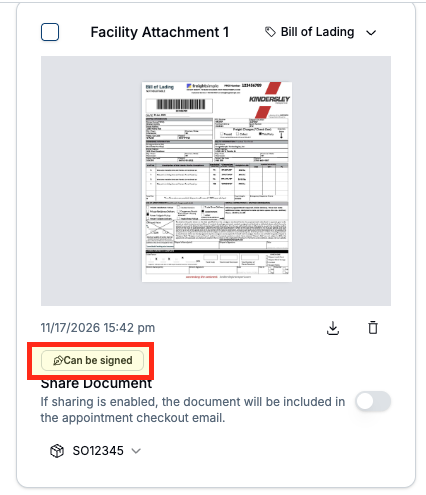
Uploading the BOL
Upload the BOL while the truck is loading, so it's ready to send when the load is done.
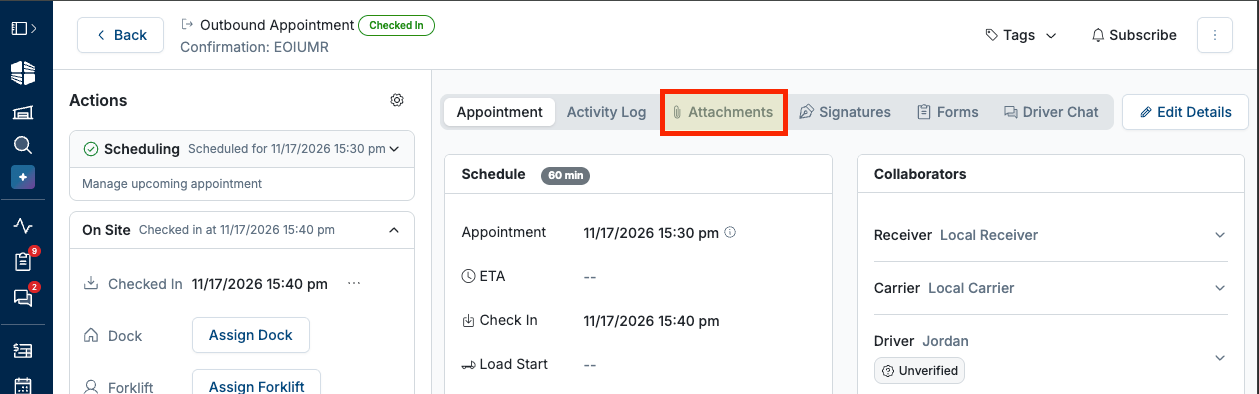
Open the appointment and go to Attachments.
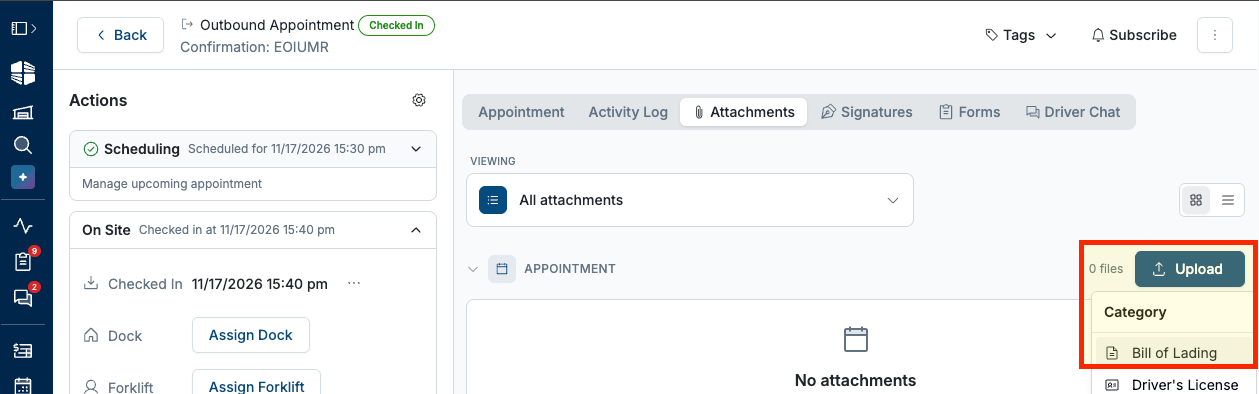
Click Upload and choose Bill of Lading.
Select the BOL PDF.
Repeat for each BOL on the load.
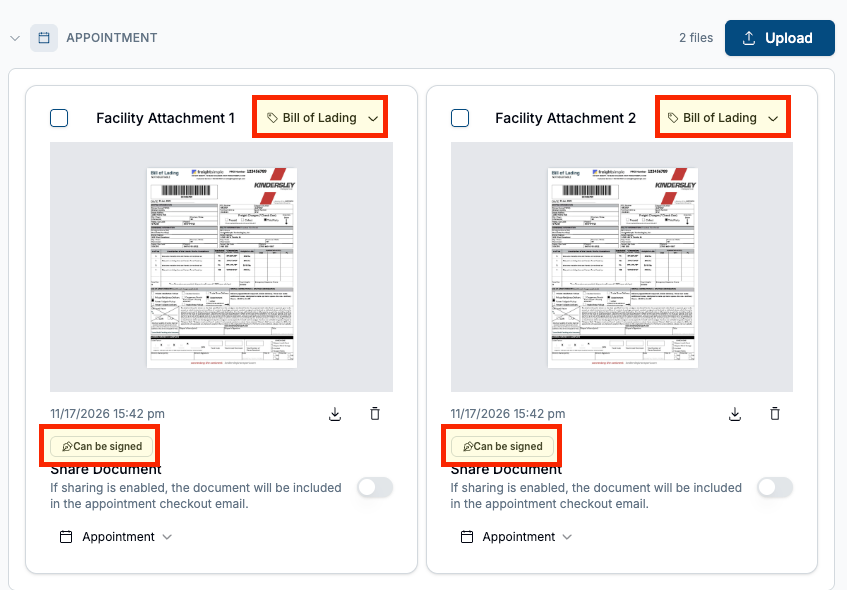
NOTE that when one appointment has more than one order, add each reference ID to the appointment first. Then drag each BOL into its order on the Attachments tab so every BOL is tied to the right order.
Requesting a Signature
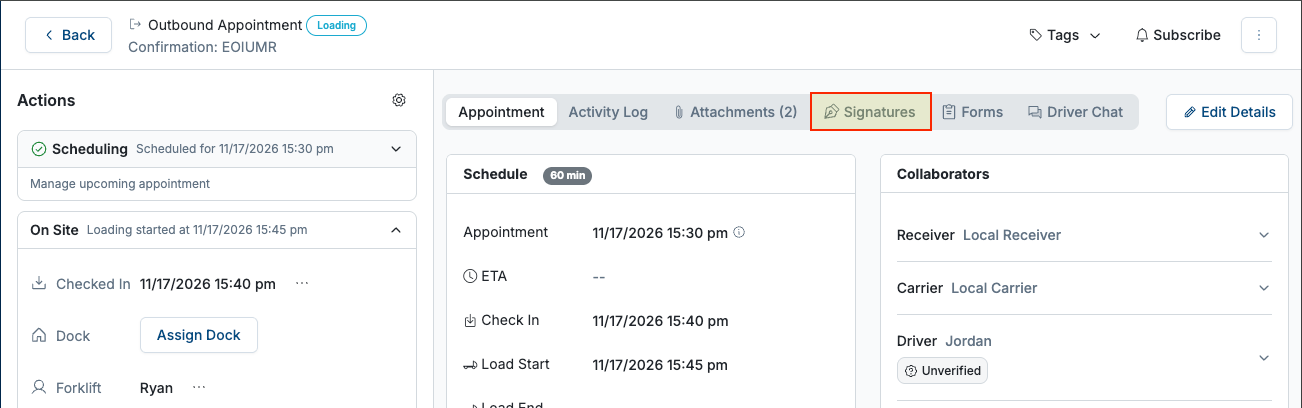
Go to the appointment's Signatures tab. BOLs ready for signature are listed under Can be signed.
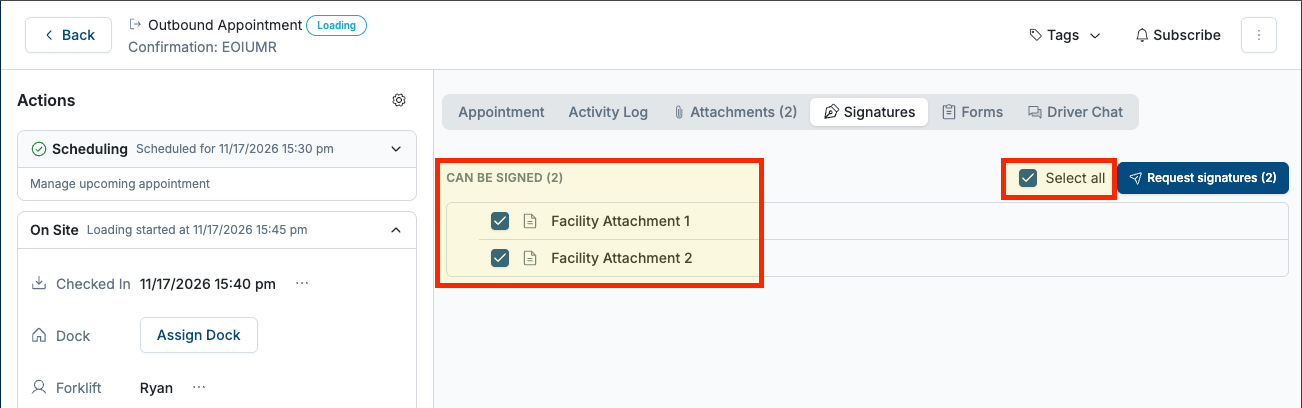
Select the BOLs you want signed and click Request Signature.
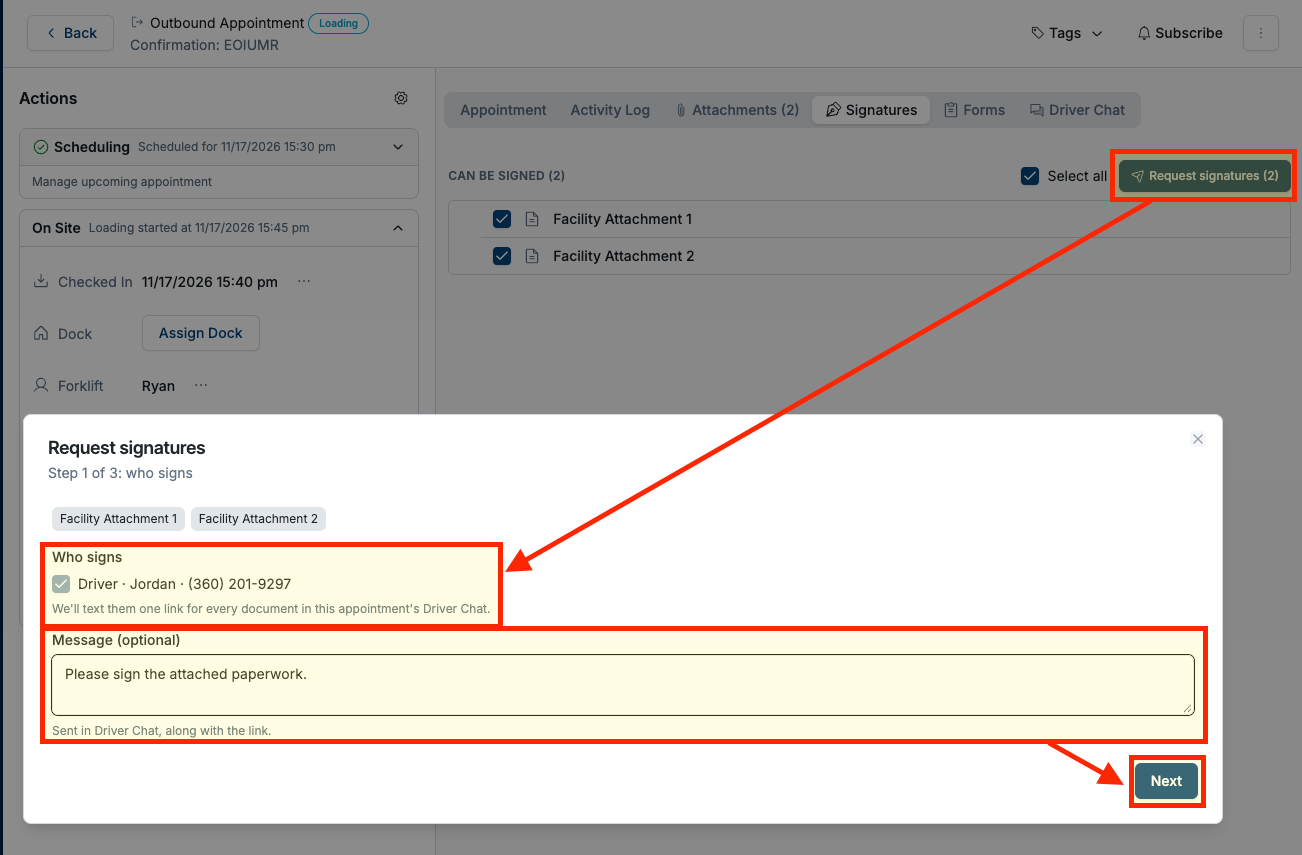
On Who signs, confirm the driver and their phone number. Add an optional message, such as "Please sign the attached paperwork." Click Next.
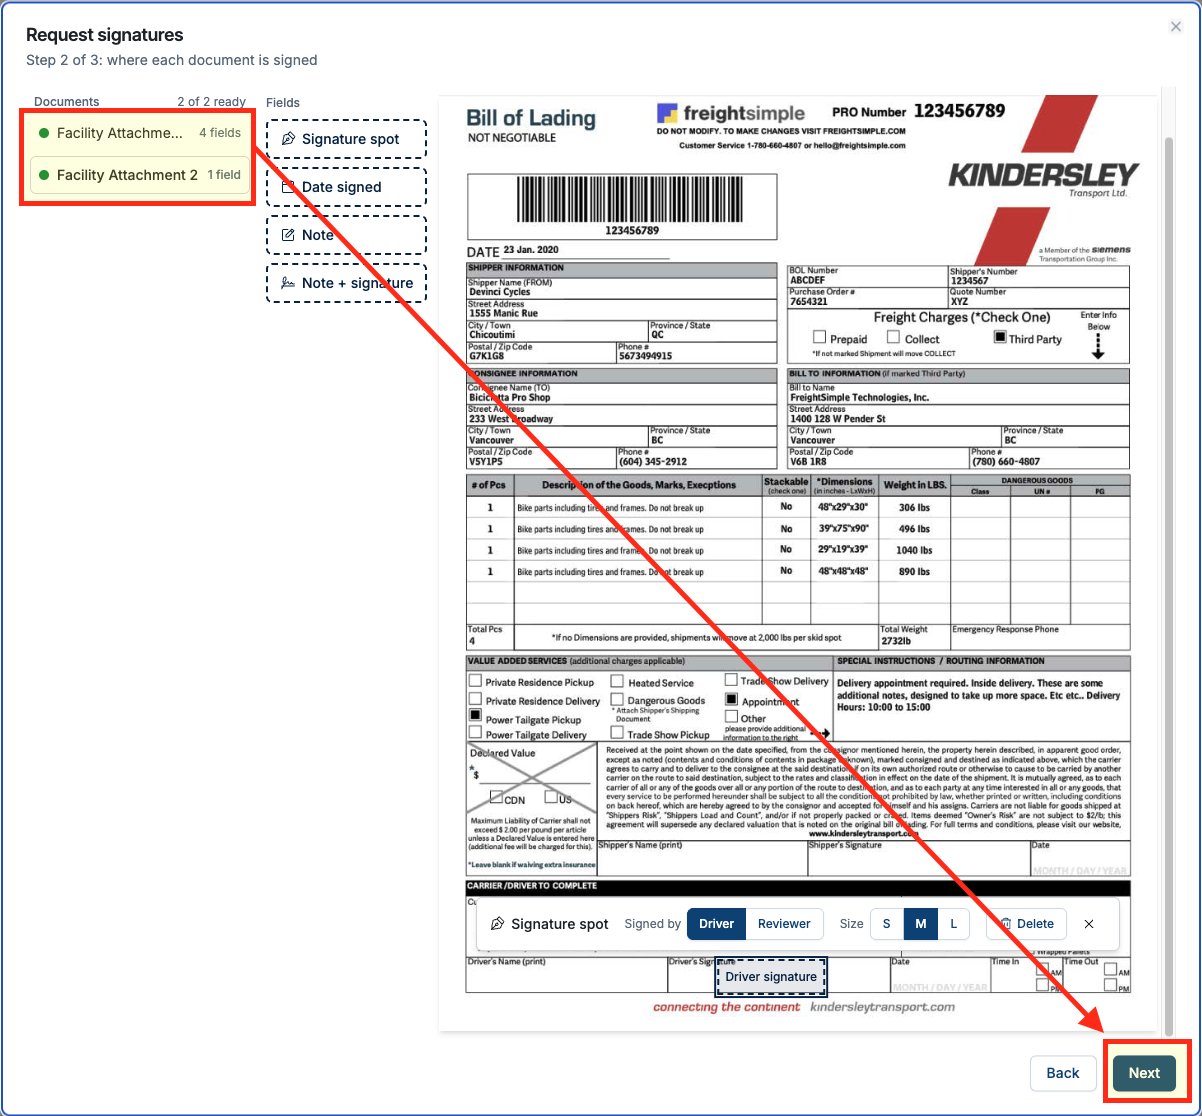
On each BOL, place the fields the driver needs to fill, described below. Click Next when every BOL is set.
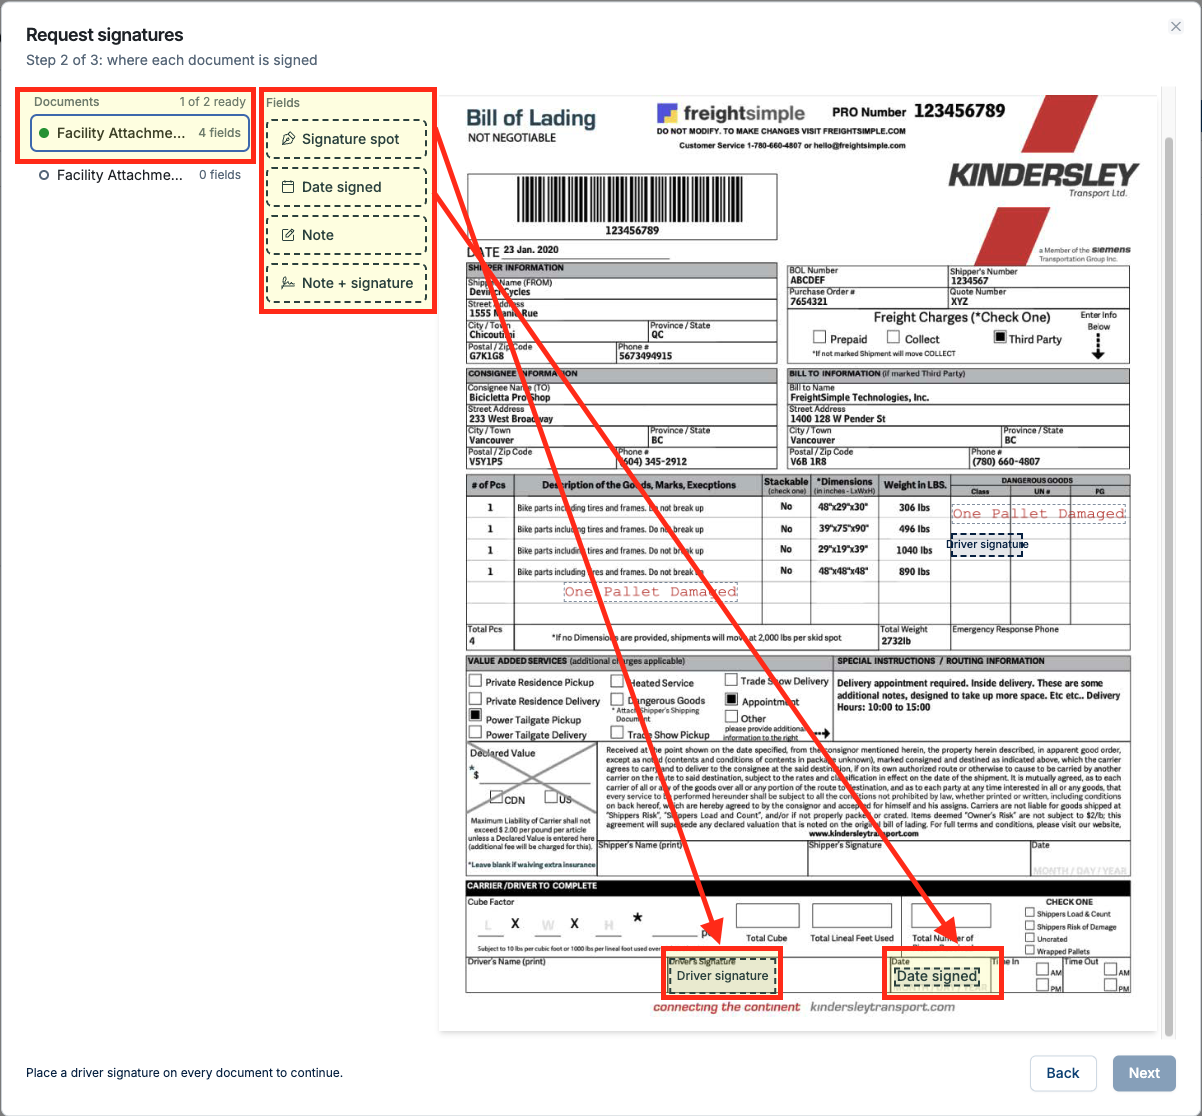
After adding all the required signatures for all attachments, you will see a green status indicating that you’re ready to proceed. Click Next.
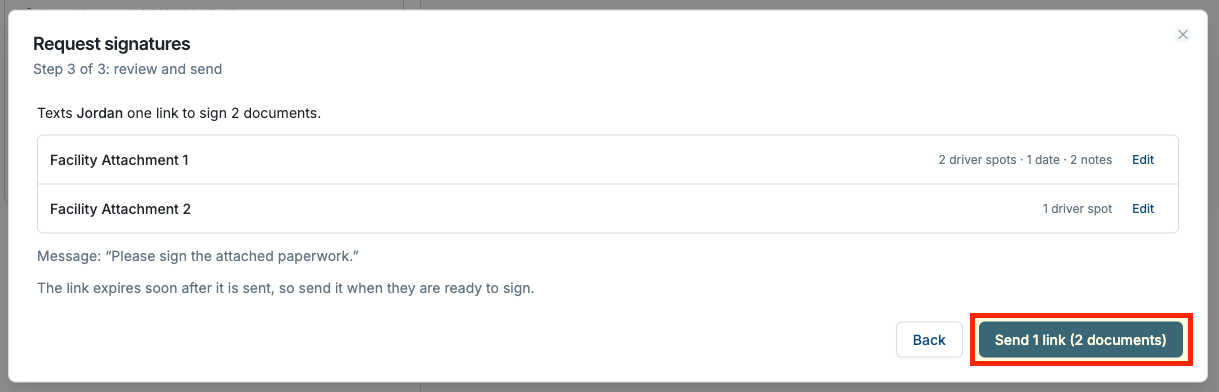
On Review, check the summary, such as "Text Jordan 1 link to sign 2 documents," and click Send.
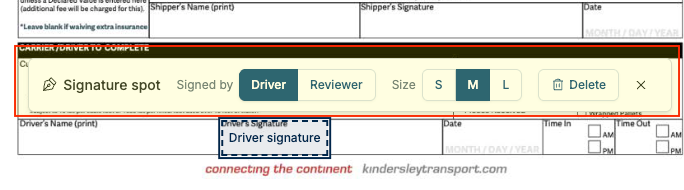
The fields you can place on a BOL:
Signature: Drag it to where the signature goes. Choose Signed by Driver or Signed by Reviewer, and a size.
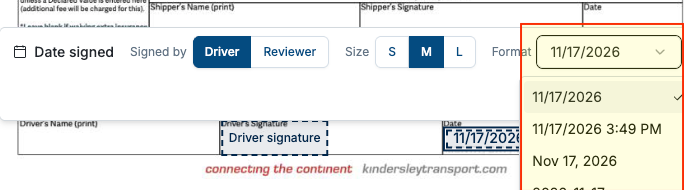
Date Signed: Fills in automatically with the date of signature. Choose a format, such as 11/17/2026 or November 17, 2026, with or without the time.
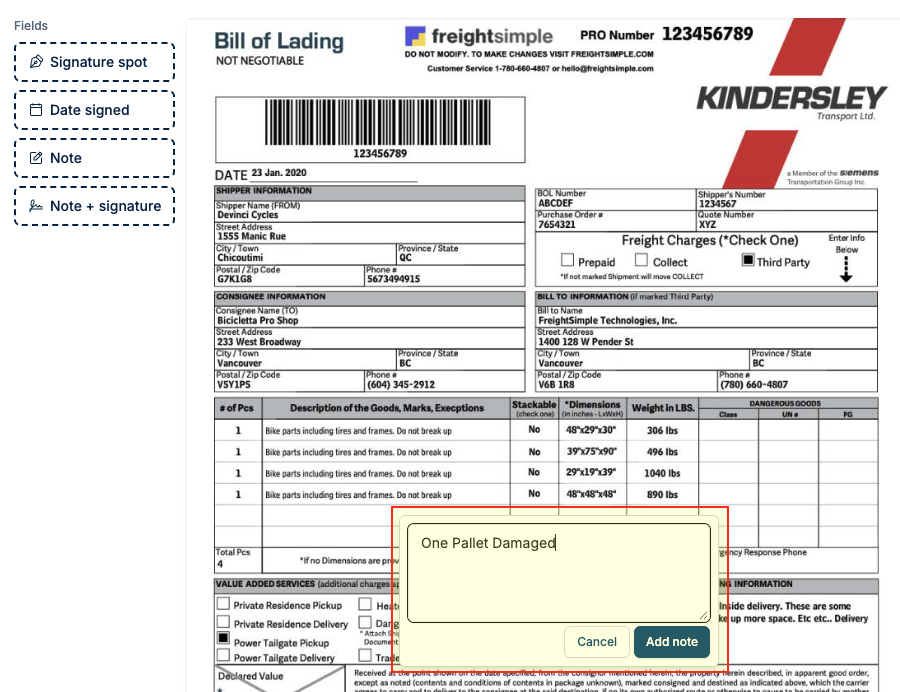
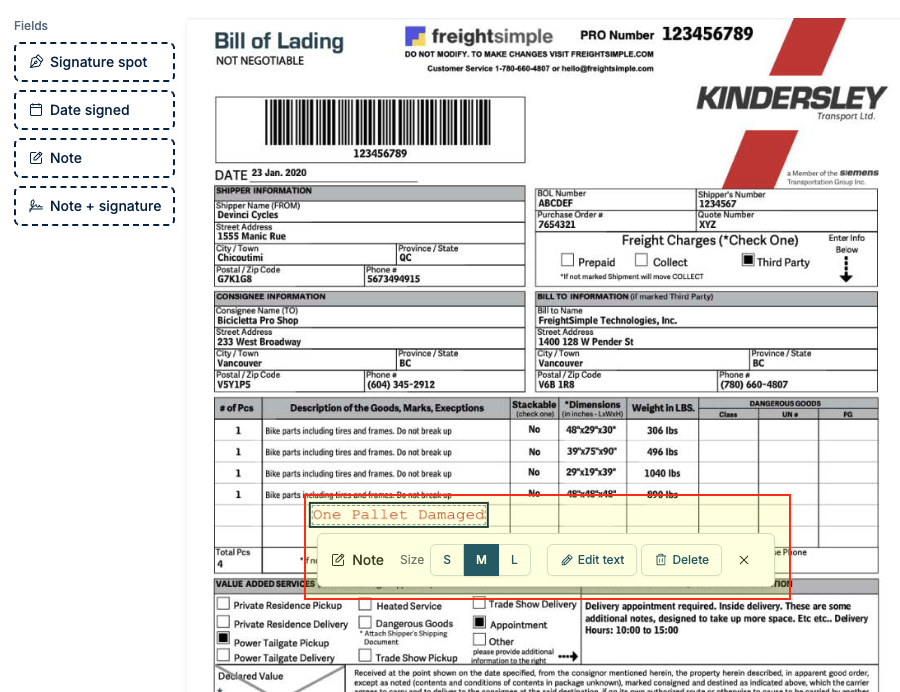
Note: Adds text directly onto the BOL, such as a corrected pallet count or "one pallet damaged."
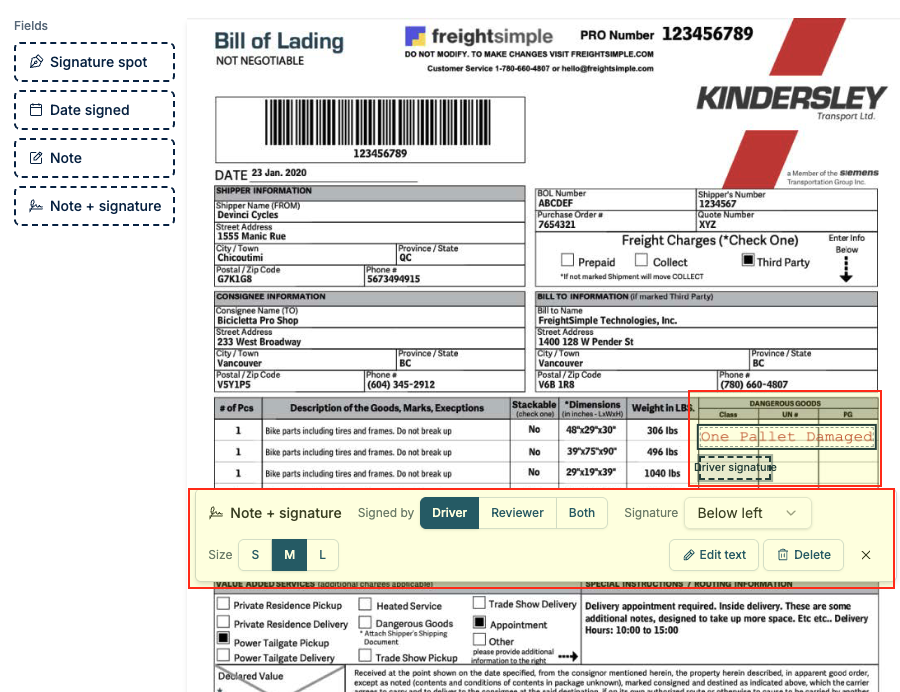
Note + Signature: Adds text directly onto the BOL, such as a corrected pallet count or "one pallet damaged." with a required field for signature.
The driver gets one text with one link for every BOL you selected.
NOTE that once the driver signs, fields and notes can't be changed. To fix a mistake, void the request and send a new one.
What the Driver Sees
The driver gets a text like this:
[Facility name] has asked you to sign "[Document name]".
[Your message, if you added one]
Review and sign within 30 minutes: [link]
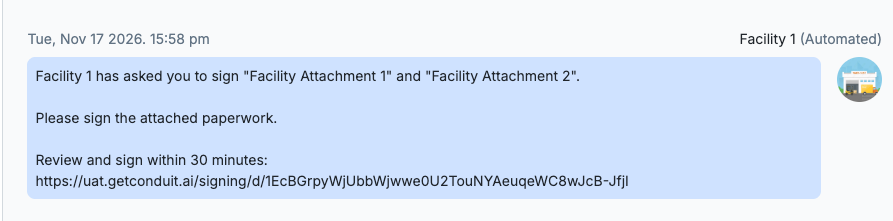
What the driver does:
They tap the link. A page lists the documents waiting for their signature.
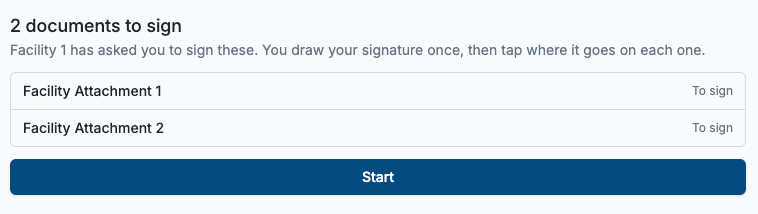
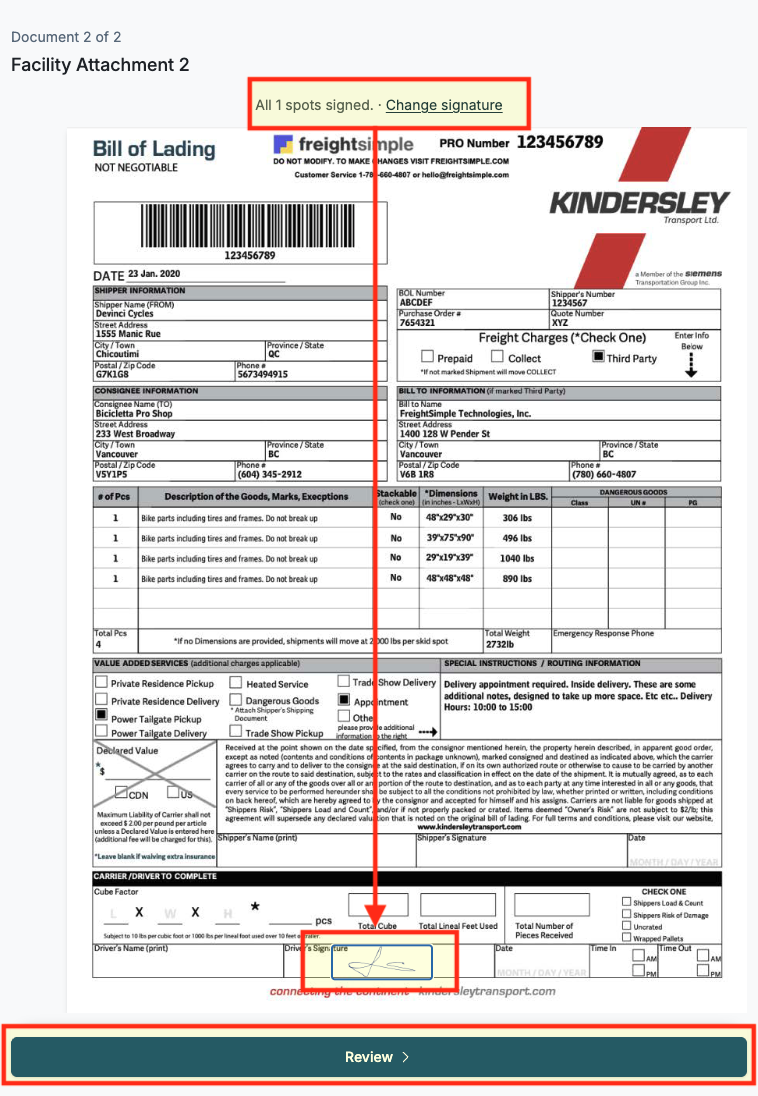
They tap Start. The document opens with the spots to sign highlighted.
They sign with a finger or stylus. The date and any notes your team added fill in on the document.
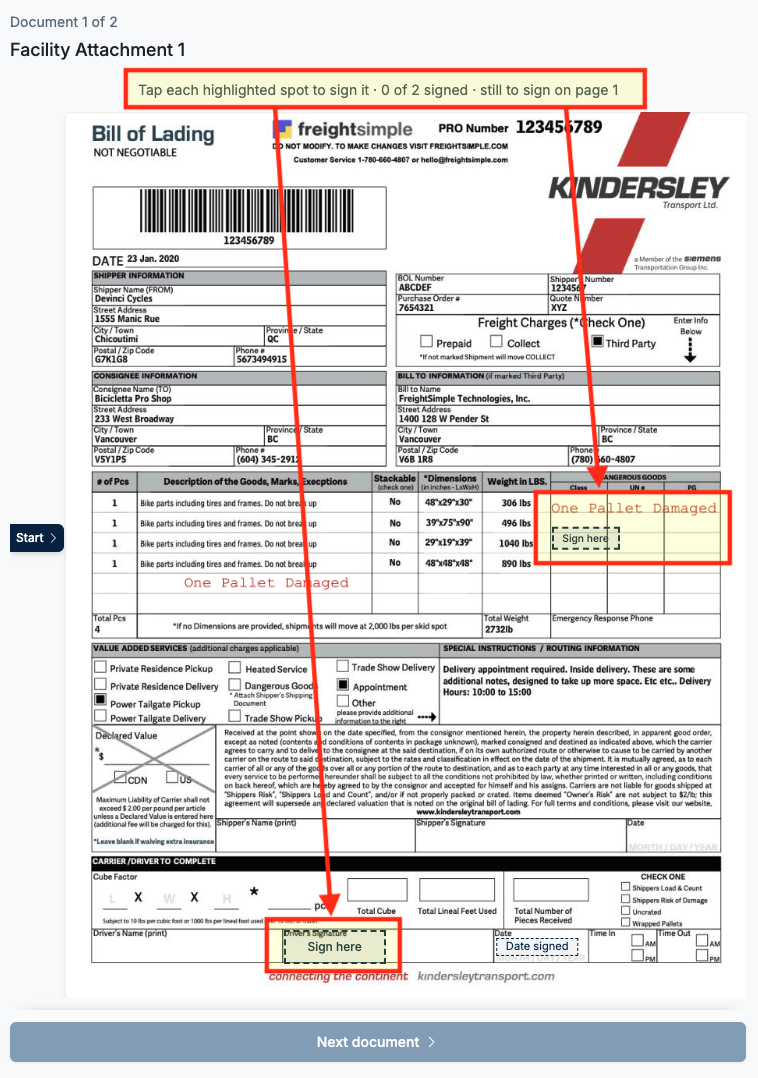
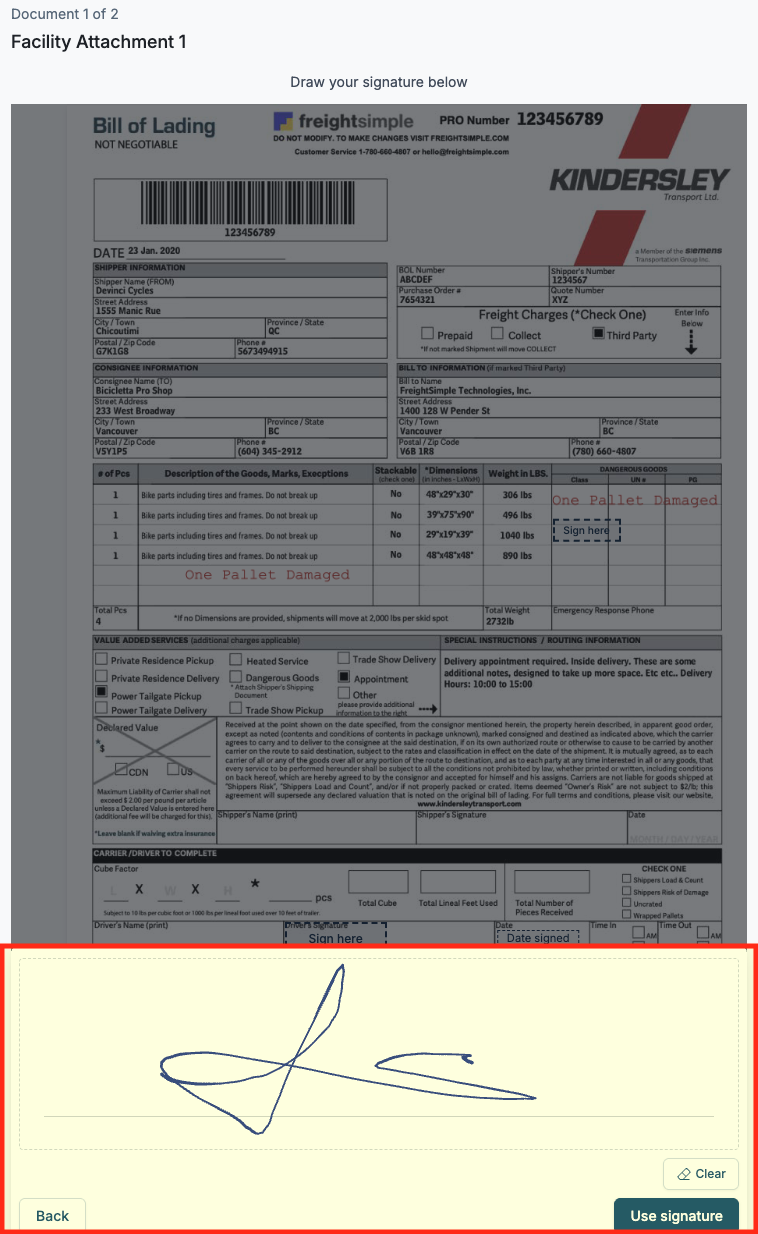
They tap Next Document. Their signature carries over to the remaining documents, so they don't redraw it.
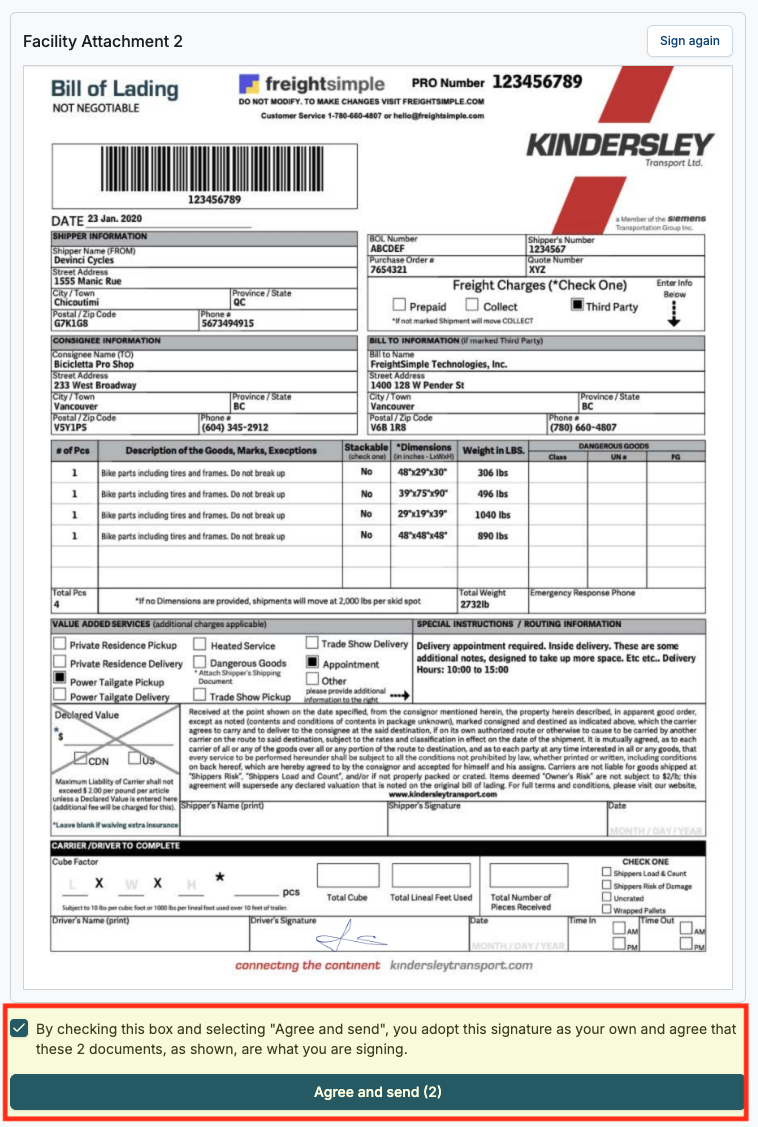
They tap Review to see every document, and can sign again if something is wrong.
They check the box to adopt the signature as their own and agree to the documents, then tap Agree and Send.
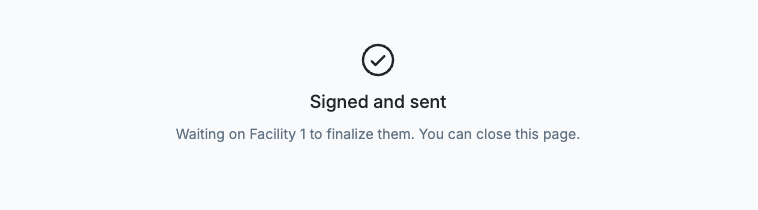
The driver sees a confirmation that the documents were signed and sent, and are waiting on the facility to finalize. The link is good for 30 minutes. If it runs out, resend it from the appointment.
Finalizing the Signed BOLs
When the driver submits, Conduit tells your team in three places:
Tasks: The request shows as Ready to Finalize, with signatures that need your review.
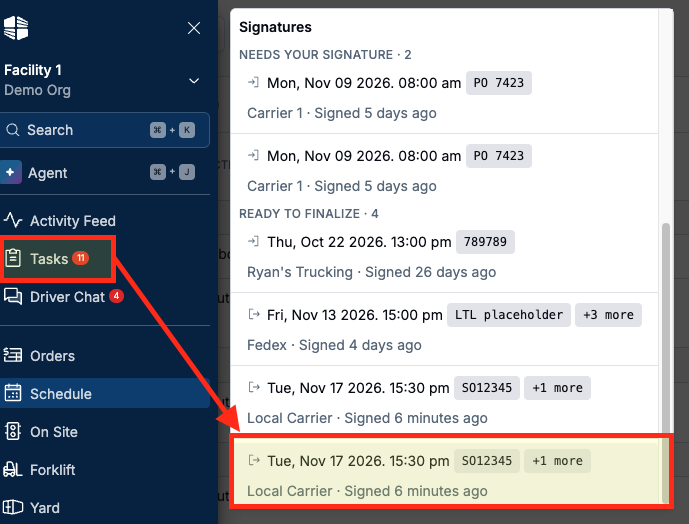
Appointment Icon: An icon appears on the appointment in the Schedule.

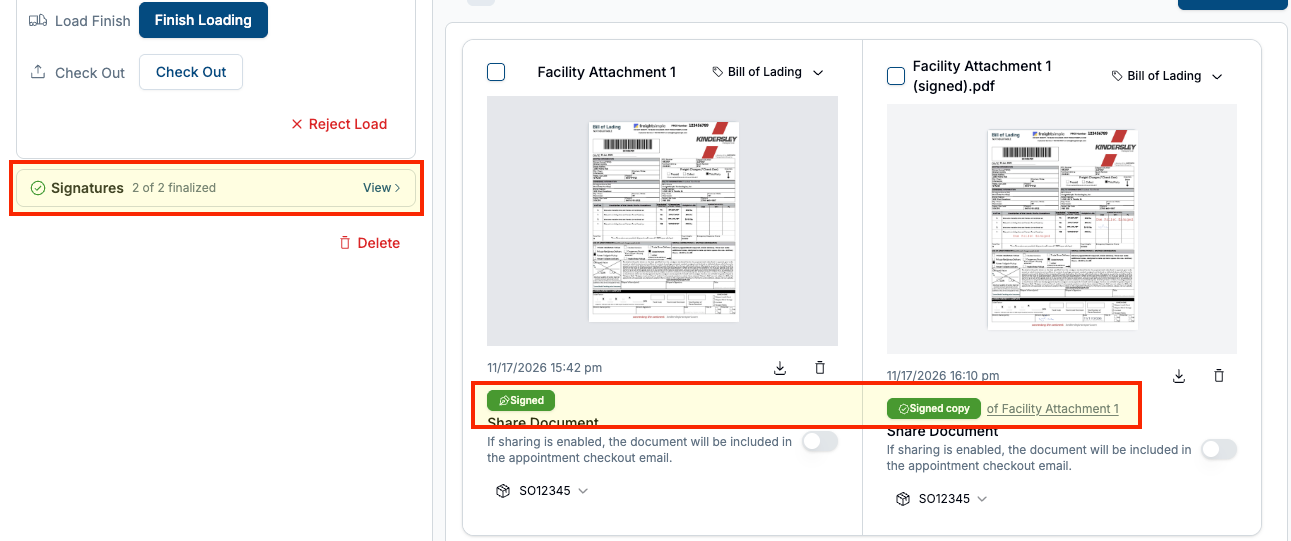
The appointment: Under Checkout in the action pane, a count of signatures not yet finalized.
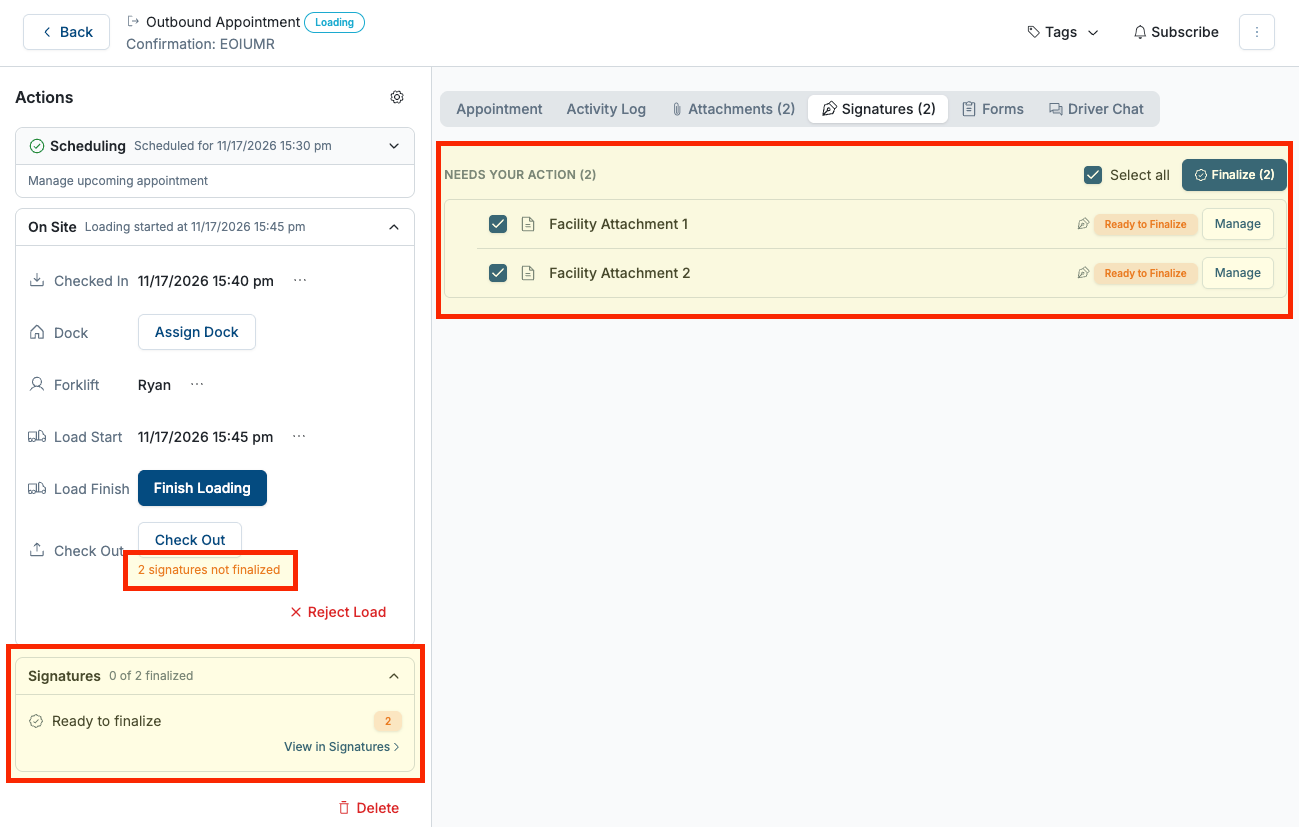
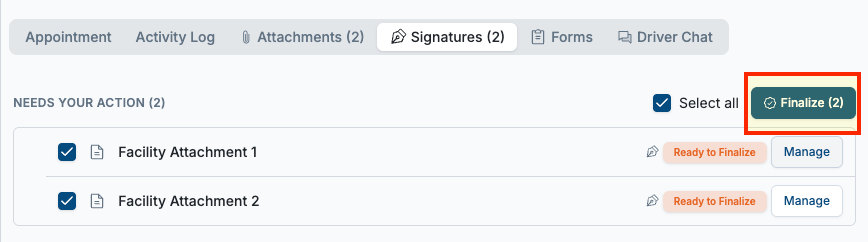
Open the request from Tasks, or go to the appointment's Signatures tab.
Click Finalize.
Review each document. You have to click through every document before you can finalize.
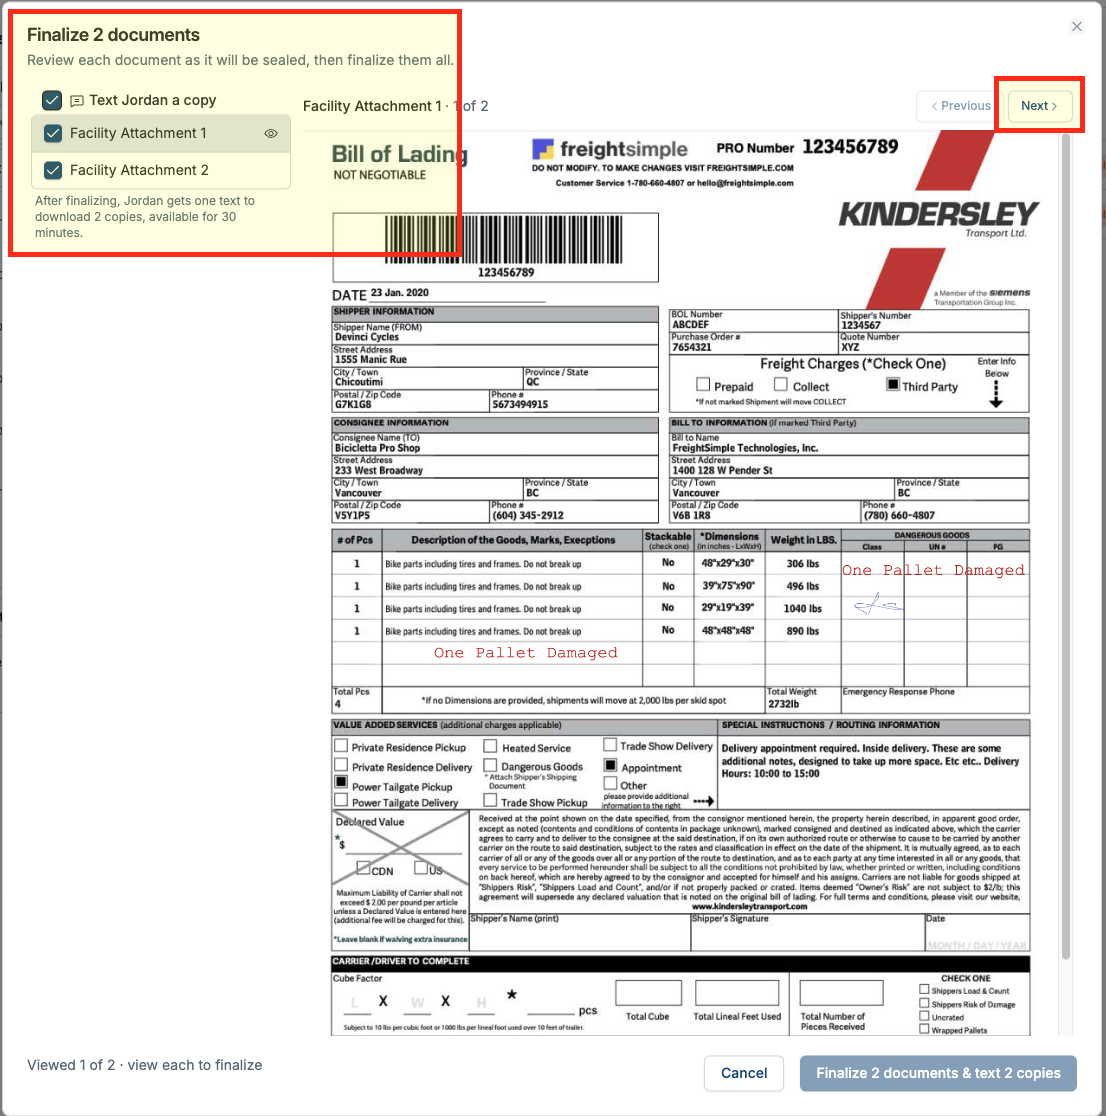
If a spot is marked Signed by Reviewer, add your signature.
Leave the text-a-copy toggle on to send the driver the signed BOLs, or turn it off.
Click Finalize. The button shows what will happen, such as "Finalize 2 documents and text 2 copies."
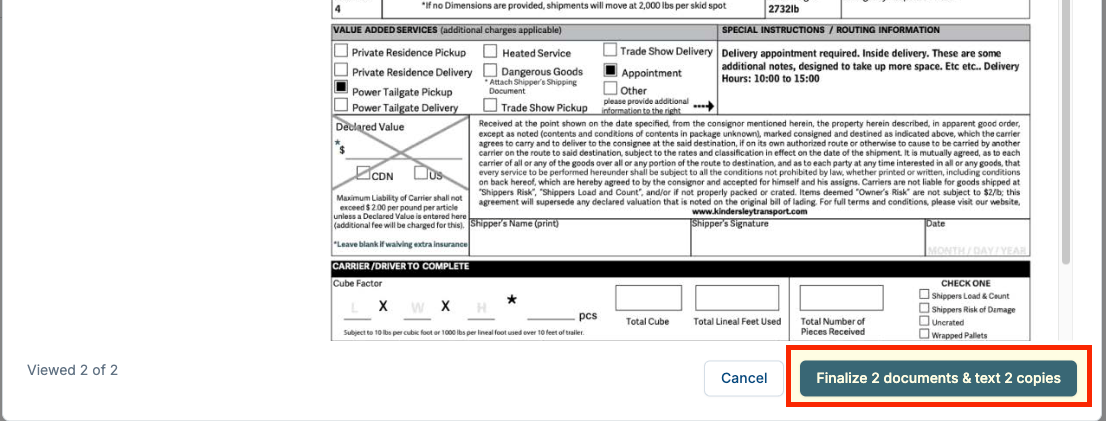
The BOLs now show as Signed on the Signatures tab. Conduit keeps both the original and the signed copy on the appointment, with the time each signature was made. Finish loading and check out the appointment as usual.
Sending the Driver a Copy
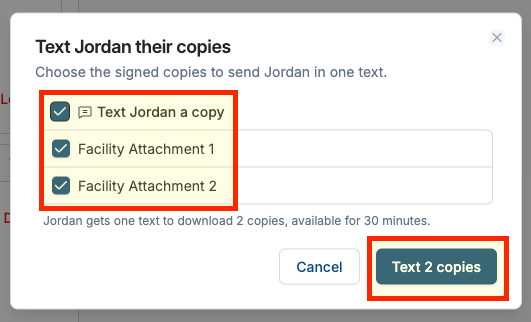
If you texted copies when you finalized, the driver gets a message that their signed documents are ready, with a link to download them. The message also shows in Driver Chat.

To send copies later, click Text Copies to Driver on the appointment, or use Manage on the BOL.
NOTE that the download link expires after 30 minutes, so the driver should download right away.
Drivers who want a paper copy can still be handed a printed one. To share the signed BOL with anyone else, download it from the appointment.
Managing a Request
Click Manage on the Signatures tab to step through each request. For each one you can:
Void the request: Cancels it so you can fix the BOL or fields and send a new request.
Add my signature: Signs any spots marked Signed by Reviewer.
Finalize: Seals the signed document.
Send a copy: Texts the driver a link to the signed BOL, good for 30 minutes.
If the driver's signing link expired before they signed, resend the request from the same place.
NOTE that a signed document is locked on purpose. The notes the driver agreed to can't be changed after the fact.
Turning On Electronic Signature
Electronic signature is enabled by the Conduit team. Contact [email protected] to have it turned on for your facility.
Frequently Asked Questions
Why don't I see any documents to sign?
Check the BOL. It has to be a PDF uploaded with the Bill of Lading category. A BOL that qualifies shows a Can be signed icon.
Does the driver have to sign each BOL separately?
One link covers every BOL in the request. The driver draws their signature once, and it carries over to each document.
Can Conduit create the BOL for me?
No. Upload the BOL your WMS or ERP produces. Conduit handles the signing, not the BOL itself.
Does the driver need to download an app or create an account?
No. The text link opens in their phone's browser. Holding the link is what lets them sign, which is why it expires after 30 minutes.
Can I change a BOL after the driver signs it?
No. Void the request, fix the BOL or fields, and send a new request.
What if the driver doesn't have a smartphone or has no signal?
The driver needs a working connection to open the link. If your site has poor reception or drivers without smartphones, talk to your Conduit team about using a facility tablet.
Why does Adobe say the signer is unknown?
Conduit seals documents with its own certificate, which some PDF readers do not recognize. The signature is still valid and recorded in Conduit, along with when each signature was made.
Does the signed BOL go back to my WMS or ERP?
Not automatically. If you need signed BOLs sent to another system, contact [email protected] to discuss an integration.
Can I change the text message the driver receives?
You can add your own message to each request. The rest of the wording is standard.